Python中的快速特征工程
磐创AI“在任何一种数据丰富的环境中都很容易找到模式。关键在于确定模式是代表噪声还是信号。”―奈特·西尔弗本文将介绍将图像处理作为机器学习工作流程的一部分时要遵循的一些最佳实践。库import random
from PIL import Image
import cv2
import numpy as np
from matplotlib import pyplot as plt
import json
import albumentations as A
import torch
import torchvision.models as models
import torchvision.transforms as transforms
import torch.nn as nn
from tqdm import tqdm_notebook
from torch.utils.data import DataLoader
from torchvision.datasets import CIFAR10
调整图像大小/缩放图像调整大小是该领域深度学习实践者所做的最基本的改变。这样做的主要原因是确保我们的深度学习系统收到的输入是一致的。调整大小的另一个原因是减少模型中的参数数量。更小的维数意味着更小的神经网络,从而节省了我们训练模型所需的时间和计算能力。信息丢失怎么办?从较大的图像向下调整大小时,确实会丢失一些信息。但是,根据你的任务,你可以选择愿意为训练时间和计算资源牺牲多少信息。例如,对象检测任务将要求你保持图像的纵横比,因为目标是检测对象的准确位置。相反,图像分类任务可能需要将所有图像的大小调整为指定的大小(224x224是一个很好的经验法则)。
img = Image.open("goldendoodle-1234760_960_720.jpeg")
img_resized = Image.Image.resize(img, size=(224, 224))
调整图像大小后,图像如下所示:

为什么要执行图像缩放?与表格数据类似,用于分类任务的缩放图像可以帮助我们的深度学习模型的学习率更好地收敛到最小值。缩放可确保特定维度不会主导其他维度。在StackExchange上找到了一个非常好的答案。一种特征缩放是标准化像素值的过程。我们通过从每个通道的像素值中减去每个通道的平均值,然后除以标准差。在为分类任务训练模型时,这是一种常用的特征工程选择。mean = np.mean(img_resized, axis=(1,2), keepdims=True)
std = np.std(img_resized, axis=(1,2), keepdims=True)
img_std = (img_resized - mean) / std
注意:与调整大小一样,在执行对象检测和图像生成任务时,可能不希望进行图像缩放。上面的示例代码演示了通过标准化缩放图像的过程。还有其他形式的缩放,例如居中和标准化。扩充(分类)增强图像背后的主要动机是由于计算机视觉任务的可观数据需求。通常,由于多种原因,获取足够的图像进行训练是一项挑战。图像增强使我们能够通过稍微修改原始样本来创建新的训练样本。在本例中,我们将研究如何将普通的增强应用于分类任务。我们可以使用Albumentations库来实现这一点:img_cropped = Image.fromarray(A.RandomCrop(width=225, height=225)(image=np.array(img))['image'])
img_gau_blur = Image.fromarray(A.GaussianBlur(p=0.8)(image=np.array(img_resized))['image'])
img_flip = Image.fromarray(A.Flip(0.8)(image=np.array(img_resized))['image'])
高斯模糊、随机裁剪、翻转:


通过应用图像增强,我们的深度学习模型可以更好地概括任务(避免过拟合),从而提高其对未知数据的预测能力。增强(目标检测)Albumentations库还可用于为其他任务(如对象检测)创建增强。对象检测要求我们在感兴趣的对象周围创建边界框。当试图用边界框的坐标注释图像时,使用原始数据可能是一项挑战。幸运的是,有许多公开和免费可用的数据集,我们可以用来创建用于对象检测的增强管道。其中一个数据集就是国际象棋数据集。该数据集包含棋盘上的606张棋子图像。除了这些图像,还提供了一个JSON文件,其中包含与单个图像中每个棋子的边界框相关的所有信息。通过编写一个简单的函数,我们可以在应用扩展后可视化数据:
with open("_annotations.coco.json") as f:
json_file = json.load(f)
x_min, y_min, w, h = json_file['annotations'][0]['bbox']
x_min, x_max, y_min, y_max = int(x_min), int(x_min + w), int(y_min), int(y_min + h)
def visualize_bbox(img, bbox, class_name, color=(0, 255, 0), thickness=2):
x_min, y_min, w, h = bbox
x_min, x_max, y_min, y_max = int(x_min), int(x_min + w), int(y_min), int(y_min + h)
cv2.rectangle(img, (x_min, y_min), (x_max, y_max), color=color, thickness=thickness)
((text_width, text_height), _) = cv2.getTextSize(class_name, cv2.FONT_HERSHEY_SIMPLEX, 0.35, 1)
cv2.rectangle(img, (x_min, y_min - int(1.3 * text_height)), (x_min + text_width, y_min), BOX_COLOR, -1)
cv2.putText(
img,
text=class_name,
org=(x_min, y_min - int(0.3 * text_height)),
fontFace=cv2.FONT_HERSHEY_SIMPLEX,
fontScale=0.35,
color=(255, 255, 255),
lineType=cv2.LINE_AA,
)
return img
bbox_img = visualize_bbox(np.array(img),
json_file['annotations'][0]['bbox'],
class_name=json_file['categories'][0]['name'])
Image.fromarray(bbox_img)
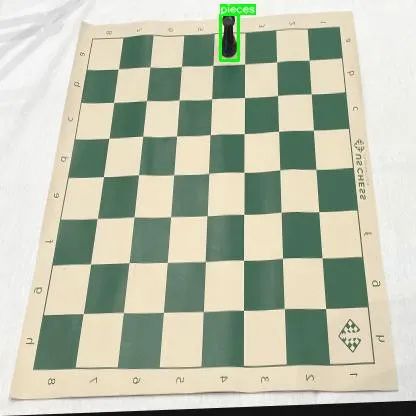
现在,让我们尝试使用Albumentations创建一个增强管道。包含注释信息的JSON文件具有以下键:dict_keys([‘info’, ‘licenses’, ‘categories’, ‘images’, ‘annotations’])
图像包含有关图像文件的信息,而注释包含有关图像中每个对象的边界框的信息。最后,类别包含映射到图像中棋子类型的键。image_list = json_file.get('images')
anno_list = json_file.get('annotations')
cat_list = json_file.get('categories')
image_list:[{'id': 0,
'license': 1,
'file_name': 'IMG_0317_JPG.rf.00207d2fe8c0a0f20715333d49d22b4f.jpg',
'height': 416,
'width': 416,
'date_captured': '2021-02-23T17:32:58+00:00'},
{'id': 1,
'license': 1,
'file_name': '5a8433ec79c881f84ef19a07dc73665d_jpg.rf.00544a8110f323e0d7721b3acf2a9e1e.jpg',
'height': 416,
'width': 416,
'date_captured': '2021-02-23T17:32:58+00:00'},
{'id': 2,
'license': 1,
'file_name': '675619f2c8078824cfd182cec2eeba95_jpg.rf.0130e3c26b1bf275bf240894ba73ed7c.jpg'
'height': 416,
'width': 416,
'date_captured': '2021-02-23T17:32:58+00:00'},
anno_list:[{'id': 0,
'image_id': 0,
'category_id': 7,
'bbox': [220, 14, 18, 46.023746508293286],
'area': 828.4274371492792,
'segmentation': [],
'iscrowd': 0},
{'id': 1,
'image_id': 1,
'category_id': 8,
'bbox': [187, 103, 22.686527154676014, 59.127992255841036],
'area': 1341.4088019136107,
'segmentation': [],
'iscrowd': 0},
{'id': 2,
'image_id': 2,
'category_id': 10,
'bbox': [203, 24, 24.26037020843023, 60.5],
'area': 1467.752397610029,
'segmentation': [],
'iscrowd': 0},
cat_list:[{'id': 0, 'name': 'pieces', 'supercategory': 'none'},
{'id': 1, 'name': 'bishop', 'supercategory': 'pieces'},
{'id': 2, 'name': 'black-bishop', 'supercategory': 'pieces'},
{'id': 3, 'name': 'black-king', 'supercategory': 'pieces'},
{'id': 4, 'name': 'black-knight', 'supercategory': 'pieces'},
{'id': 5, 'name': 'black-pawn', 'supercategory': 'pieces'},
{'id': 6, 'name': 'black-queen', 'supercategory': 'pieces'},
{'id': 7, 'name': 'black-rook', 'supercategory': 'pieces'},
{'id': 8, 'name': 'white-bishop', 'supercategory': 'pieces'},
{'id': 9, 'name': 'white-king', 'supercategory': 'pieces'},
{'id': 10, 'name': 'white-knight', 'supercategory': 'pieces'},
{'id': 11, 'name': 'white-pawn', 'supercategory': 'pieces'},
{'id': 12, 'name': 'white-queen', 'supercategory': 'pieces'},
{'id': 13, 'name': 'white-rook', 'supercategory': 'pieces'}]
我们必须改变这些列表的结构,以创建高效的管道:new_anno_dict = {}
new_cat_dict = {}
for item in cat_list:
new_cat_dict[item['id']] = item['name']
for item in anno_list:
img_id = item.get('image_id')
if img_id not in new_anno_dict:
temp_list = []
temp_list.append(item)
new_anno_dict[img_id] = temp_list
else:
new_anno_dict.get(img_id).append(item)
现在,让我们创建一个简单的增强管道,水平翻转图像,并为边界框添加一个参数:transform = A.Compose(
[A.HorizontalFlip(p=0.5)],
bbox_params=A.BboxParams(format='coco', label_fields=['category_ids']),
)
最后,我们将创建一个类似于Pytorch dataset类的dataset。为此,我们需要定义一个实现方法__len__和__getitem_。class ImageDataset:
def __init__(self, path, img_list, anno_dict, cat_dict, albumentations=None):
self.path = path
self.img_list = img_list
self.anno_dict = anno_dict
self.cat_dict = cat_dict
self.albumentations = albumentations
def __len__(self):
return len(self.img_list)
def __getitem__(self, idx):
# 每个图像可能有多个对象,因此有多个盒子
bboxes = [item['bbox'] for item in self.anno_dict[int(idx)]]
cat_ids = [item['category_id'] for item in self.anno_dict[int(idx)]]
categories = [self.cat_dict[idx] for idx in cat_ids]
image = self.img_list[idx]
img = Image.open(f"{self.path}{image.get('file_name')}")
img = img.convert("RGB")
img = np.array(img)
if self.albumentations is not None:
augmented = self.albumentations(image=img, bboxes=bboxes, category_ids=cat_ids)
img = augmented["image"]
return {
"image": img,
"category_ids": augmented["category_ids"],
"category": categories
}
# path是json_file和images的路径
dataset = ImageDataset(path, image_list, new_anno_dict, new_cat_dict, transform)
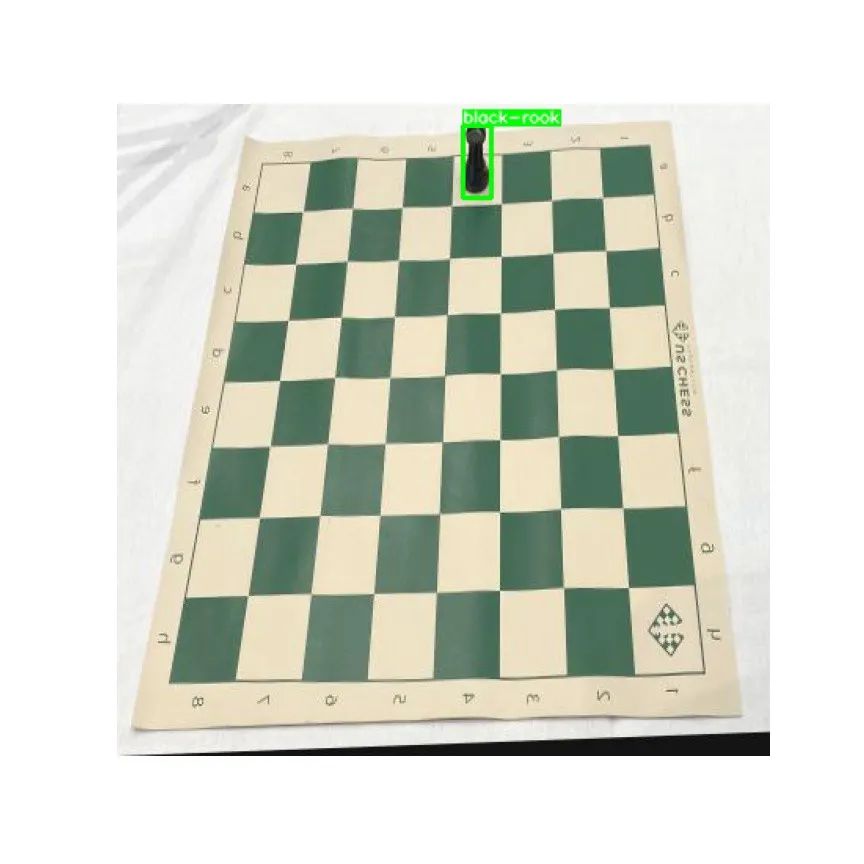
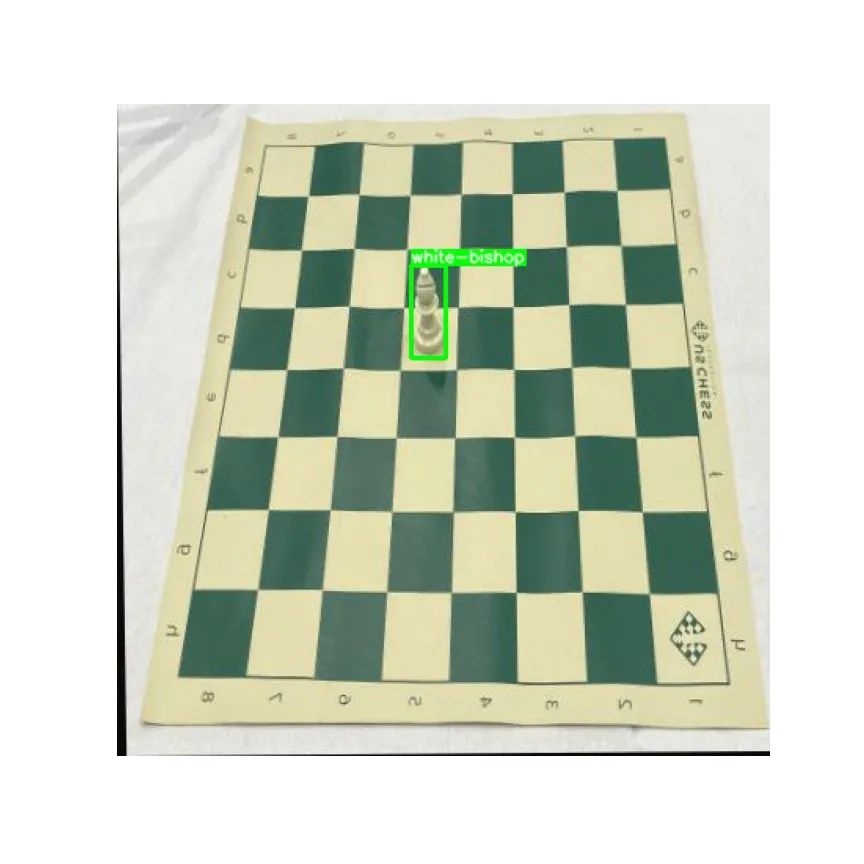
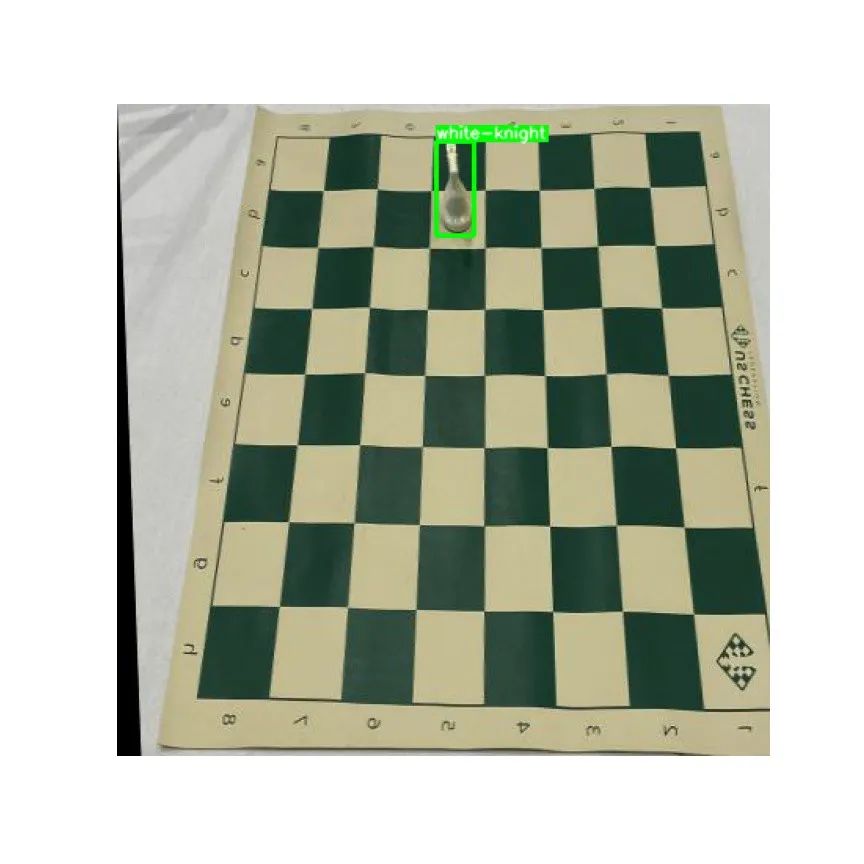
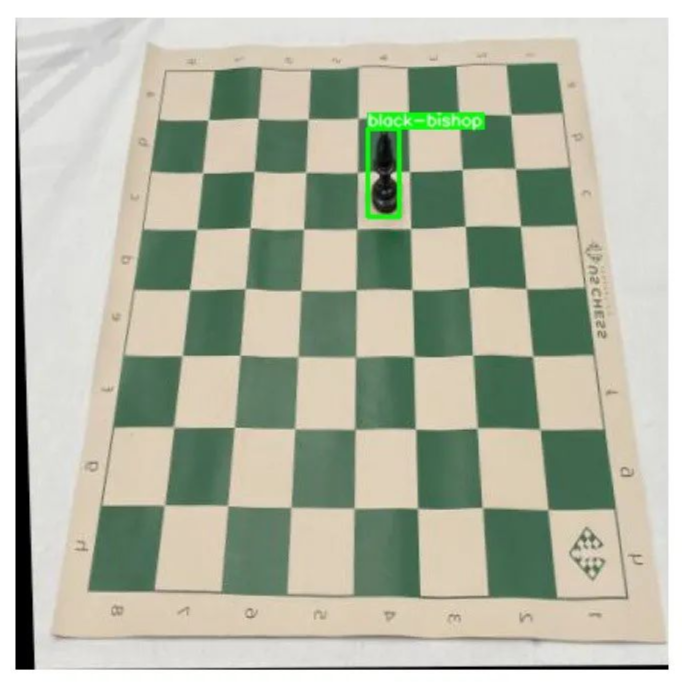
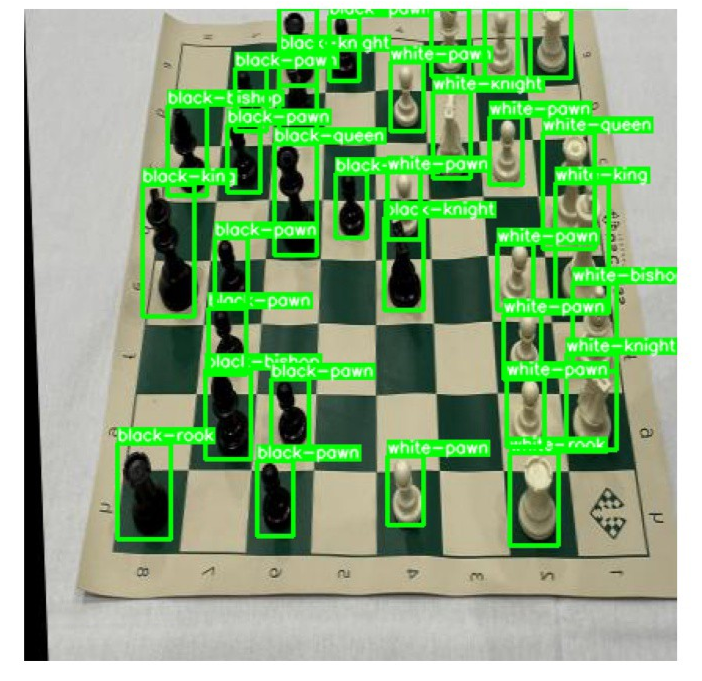
以下是在自定义数据集上迭代时的一些结果:
因此,我们现在可以轻松地将此自定义数据集传递给数据加载器以训练我们的模型。特征提取你可能听说过预训练模型用于训练图像分类器和其他有监督的学习任务。但是,你知道吗,你也可以使用预训练的模型来提取图像的特征?简言之,特征提取是一种降维形式,其中大量像素被降维为更有效的表示。这主要适用于无监督机器学习任务。让我们尝试使用Pytorch预先训练的模型从图像中提取特征。为此,我们必须首先定义我们的特征提取器类:class ResnetFeatureExtractor(nn.Module):
def __init__(self, model):
super(ResnetFeatureExtractor, self).__init__()
self.model = nn.Sequential(*model.children())[:-1]
def forward(self, x):
return self.model(x)
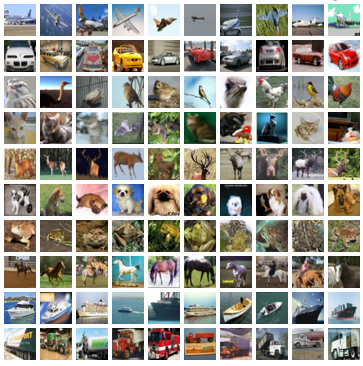
请注意,在第4行中,创建了一个新模型,将原始模型的所有层保存为最后一层。你会记得,神经网络中的最后一层是用于预测输出的密集层。然而,由于我们只对提取特征感兴趣,所以我们不需要最后一层,因此它被排除在外。然后,我们将torchvision预训练的resnet34模型传递给ResnetFeatureExtractor构造函数,从而利用该模型。让我们使用著名的CIFAR10数据集(50000张图像),并在其上循环以提取特征。CIFAR10数据集(源)
cifar_dataset = CIFAR10("./", transform=transforms.ToTensor(), download=True)
cifar_dataloader = DataLoader(cifar_dataset, batch_size=1, shuffle=True)
feature_extractor.eval()
feature_list = []
for _, data in enumerate(tqdm_notebook(cifar_dataloader)):
inputs, labels = data
with torch.no_grad():
extracted_features = feature_extractor(inputs)
extracted_features = torch.flatten(extracted_features)
feature_list.append(extracted_features)
我们现在有一个50000个图像特征向量的列表,每个特征向量的大小为512(原始resnet模型倒数第二层的输出大小)。print(fNumber of feature vectors: {len(feature_list)}") #50000
print(f"Number of feature vectors: {len(feature_list[0])}") #512
因此,该特征向量列表现在可由统计学习模型(如KNN)用于搜索类似图像。

